How to Build and Wire a Retro Arcade Control Panel (Layout + Lessons)
If you are trying to build and wire a retro arcade control panel, this is exactly how I handled mine, including the stuff I got wrong. This was part of my bigger retro arcade machine build, but the control panel is where most builds either feel great or become a hand-cramp simulator.
There are a million layout options and everybody swears theirs is perfect. Mine is just what worked for me after testing, drilling, routing, wiring, and fixing dumb mistakes. If you do no planning here, your finished cabinet can end up looking and playing like a rushed mess on r/crapmame.
Quick Answer
- Start with layout templates before you drill anything.
- Use clean button holes and a proper routed recess for joystick plates.
- Wire one control at a time and label as you go.
- Good panel ergonomics matter more than fancy graphics.
Parts and Tools I Used
- 3/4-inch MDF for the panel top
- Slagcoin button layout templates
- 1 1/8-inch spade bit or a hole saw
- Router for joystick recesses
- 3M adhesive spray, vinyl, and an X-acto knife
- Fine sandpaper and patience
Step-by-Step Build and Wiring
1) Lock your layout before drilling
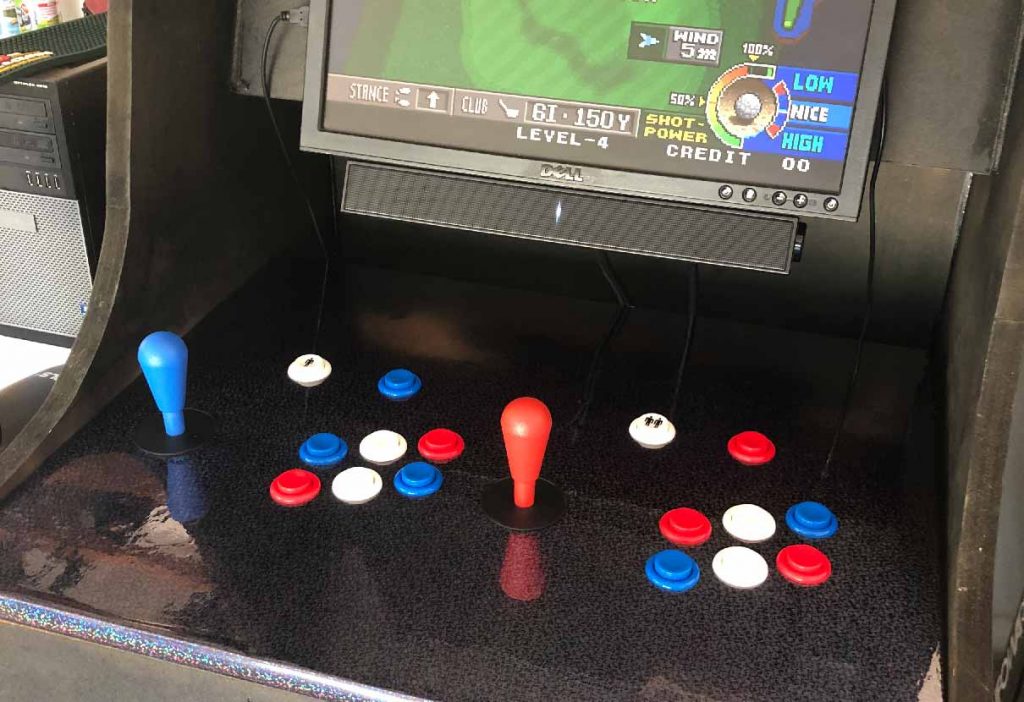
Print layouts, test them on the panel, and actually put your hands on it like you are playing. Once the layout felt right, I marked each center point through the template for buttons and joysticks.
2) Drill button and joystick holes cleanly
Drill halfway from one side until the bit tip shows through, then flip and finish from the other side. That keeps blowout down. After drilling, I hit every hole edge with fine sandpaper so buttons seated clean.

3) Route the joystick recess
Set the router depth to match your joystick plate thickness, trace the plate, and route inside the lines. It does not have to be museum quality, it just needs to sit flat and line up with the shaft hole.
4) Wrap the panel with vinyl
Doing vinyl solo is possible, but it is way easier with a second set of hands. I tacked one edge first, checked alignment, then sprayed the rest and smoothed it down. After that, trim overhang and cut out each hole.
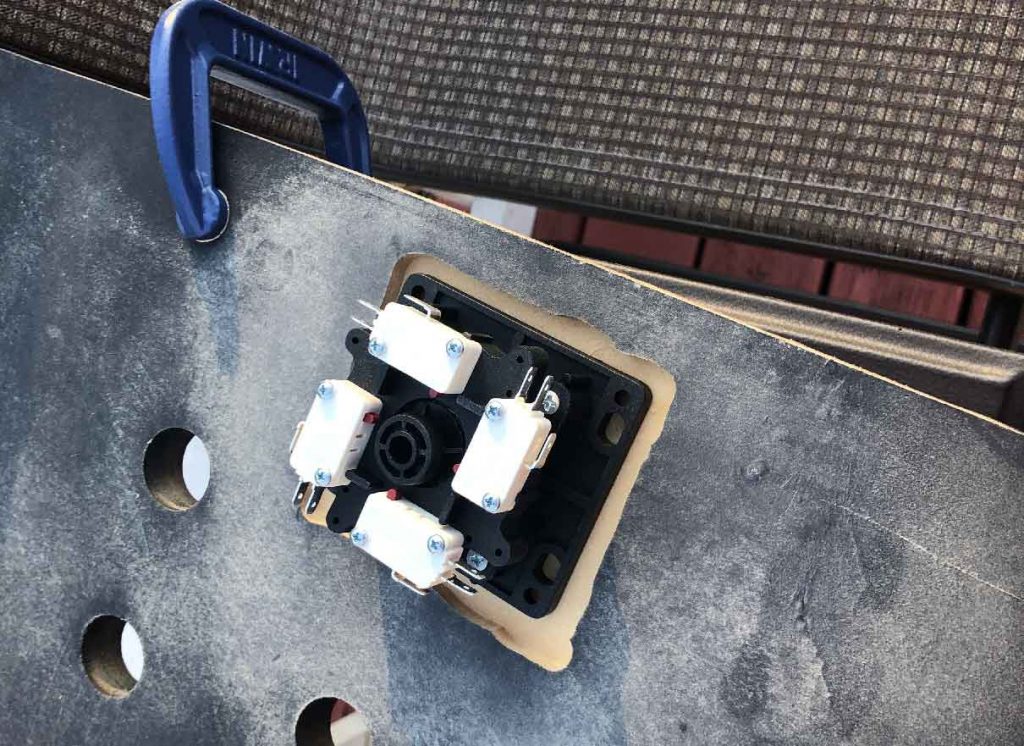
5) Wire buttons and joysticks one control at a time
Every encoder kit is a little different, so follow your specific board pinout. I wired in small batches instead of trying to do the whole panel in one shot. Labeling wires as you go saves you from tracing chaos later.
If you are also into old hardware projects, this Mac OS Classic ethernet troubleshooting writeup is another one where the process matters as much as the final answer.
What Went Wrong (So You Can Skip It)
- I burned time by second-guessing layout after drilling started.
- Vinyl bubbles happened when I rushed one edge.
- Early wiring looked like spaghetti until I slowed down and labeled.
FAQ
How do you wire arcade buttons to a USB encoder?
Most kits use one signal wire per button plus a shared ground chain. Match each input to the function you want, then test in software before you close the panel.
What layout worked best for this build?
I used Slagcoin layouts as a starting point, then adjusted spacing based on my own hand position. Print and test before drilling, always.
What would I do differently next time?
I would pre-label every wire and do a full dry fit with controls installed before any final wrapping.
What should I read next for this project stack?
For the full cabinet context read Half Ass Retro Arcade Machine Build. If you like reviving older tech in general, check out my Quadra 950 grail post and Quadra 950 Restoration Part 1.